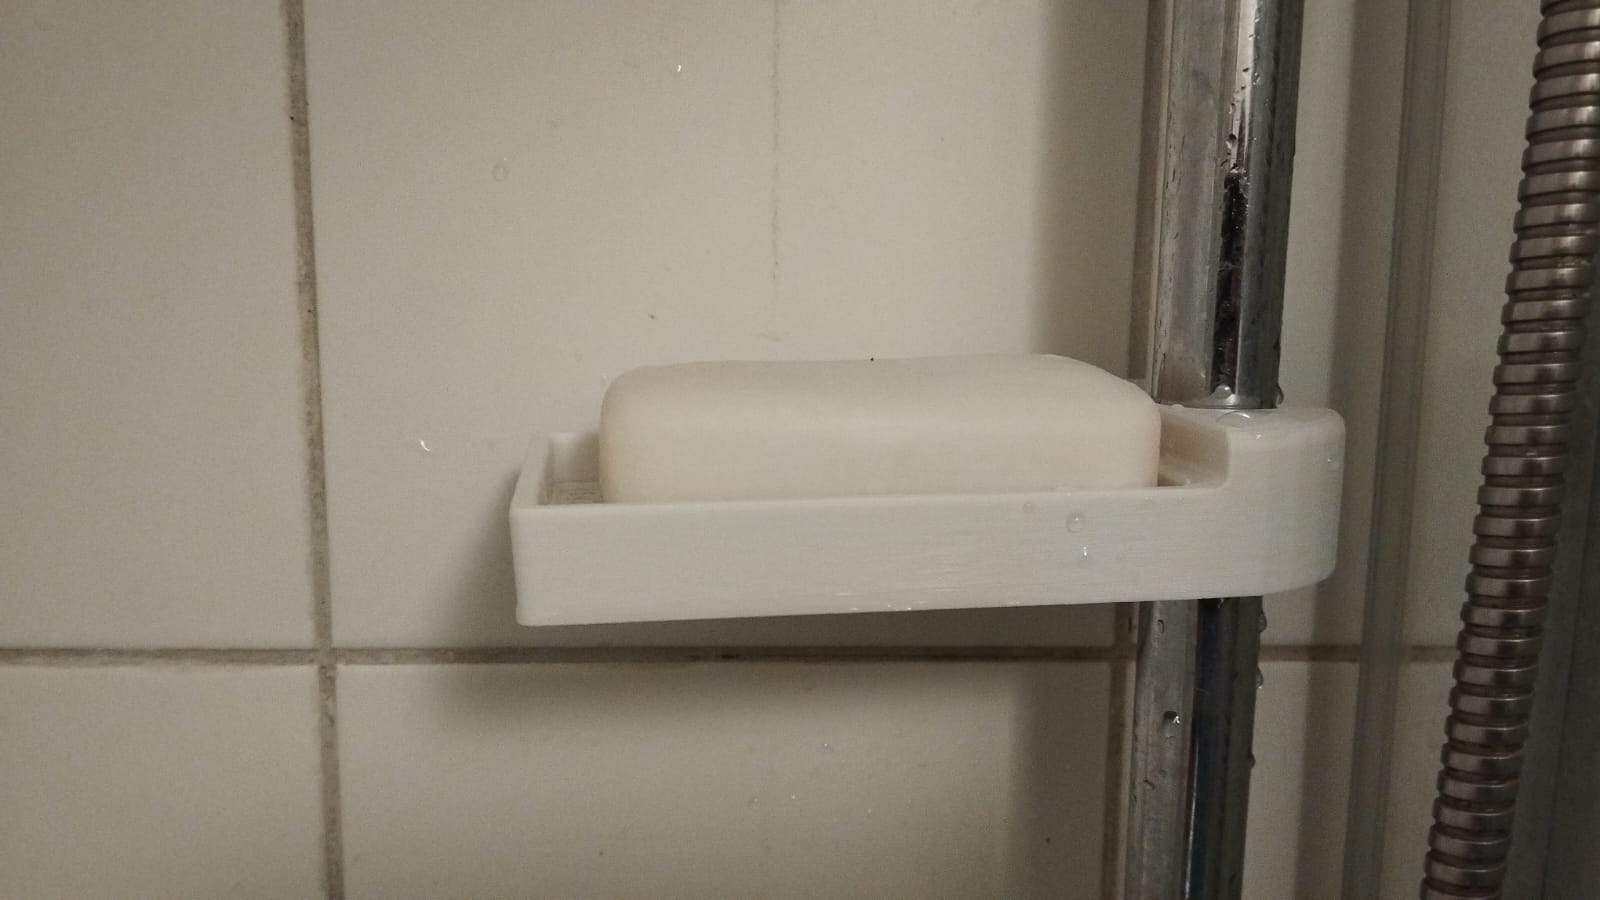
I discovered cold showers and cold water exposure a few years ago and the easiest way to this is a cold shower.
My showers has a pole on which you put the pummel when you are done, it has a soap holder.
The pole is 25 mm diameter (less, mine is 24.85 mm using the caliper like I always do)
This is the first project I will put on this website.
Soap holders are often poorly conceived, I have two of them on the pole, one came with it, the other one I bought afterwards.
The common problem is that a soap of a bigger size won’t fit.
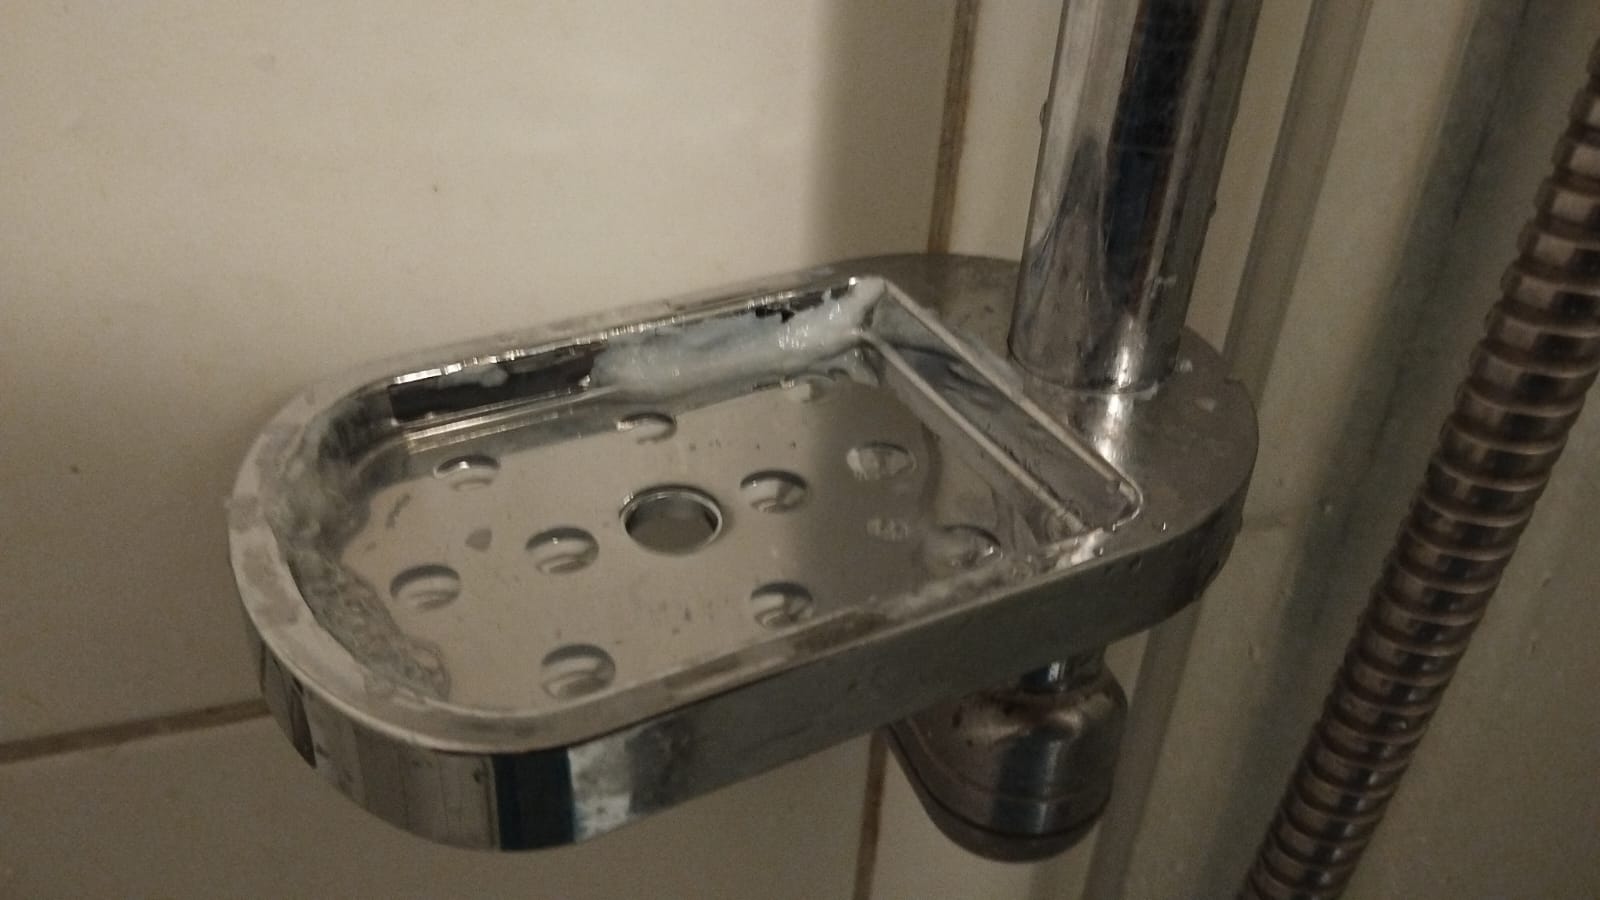
Traces of accumulation of soap deposit on the border.
The other problem is that after a shower, if the water does not evacuate properly from the soap holder, you end up wasting soap and it is quite disgusting to pick up because the bottom part of said soap is wet and mushy.
I put myself to work and in about one hour I had my first model ready, based on the one you see last, I can clip it on the bar without using any tool, this is what I wanted. I imitated the way the two existing soap holders were made, the second is slightly higher than the first one towards the bar, which I thought would give it more grip and perpendicularity to the bar.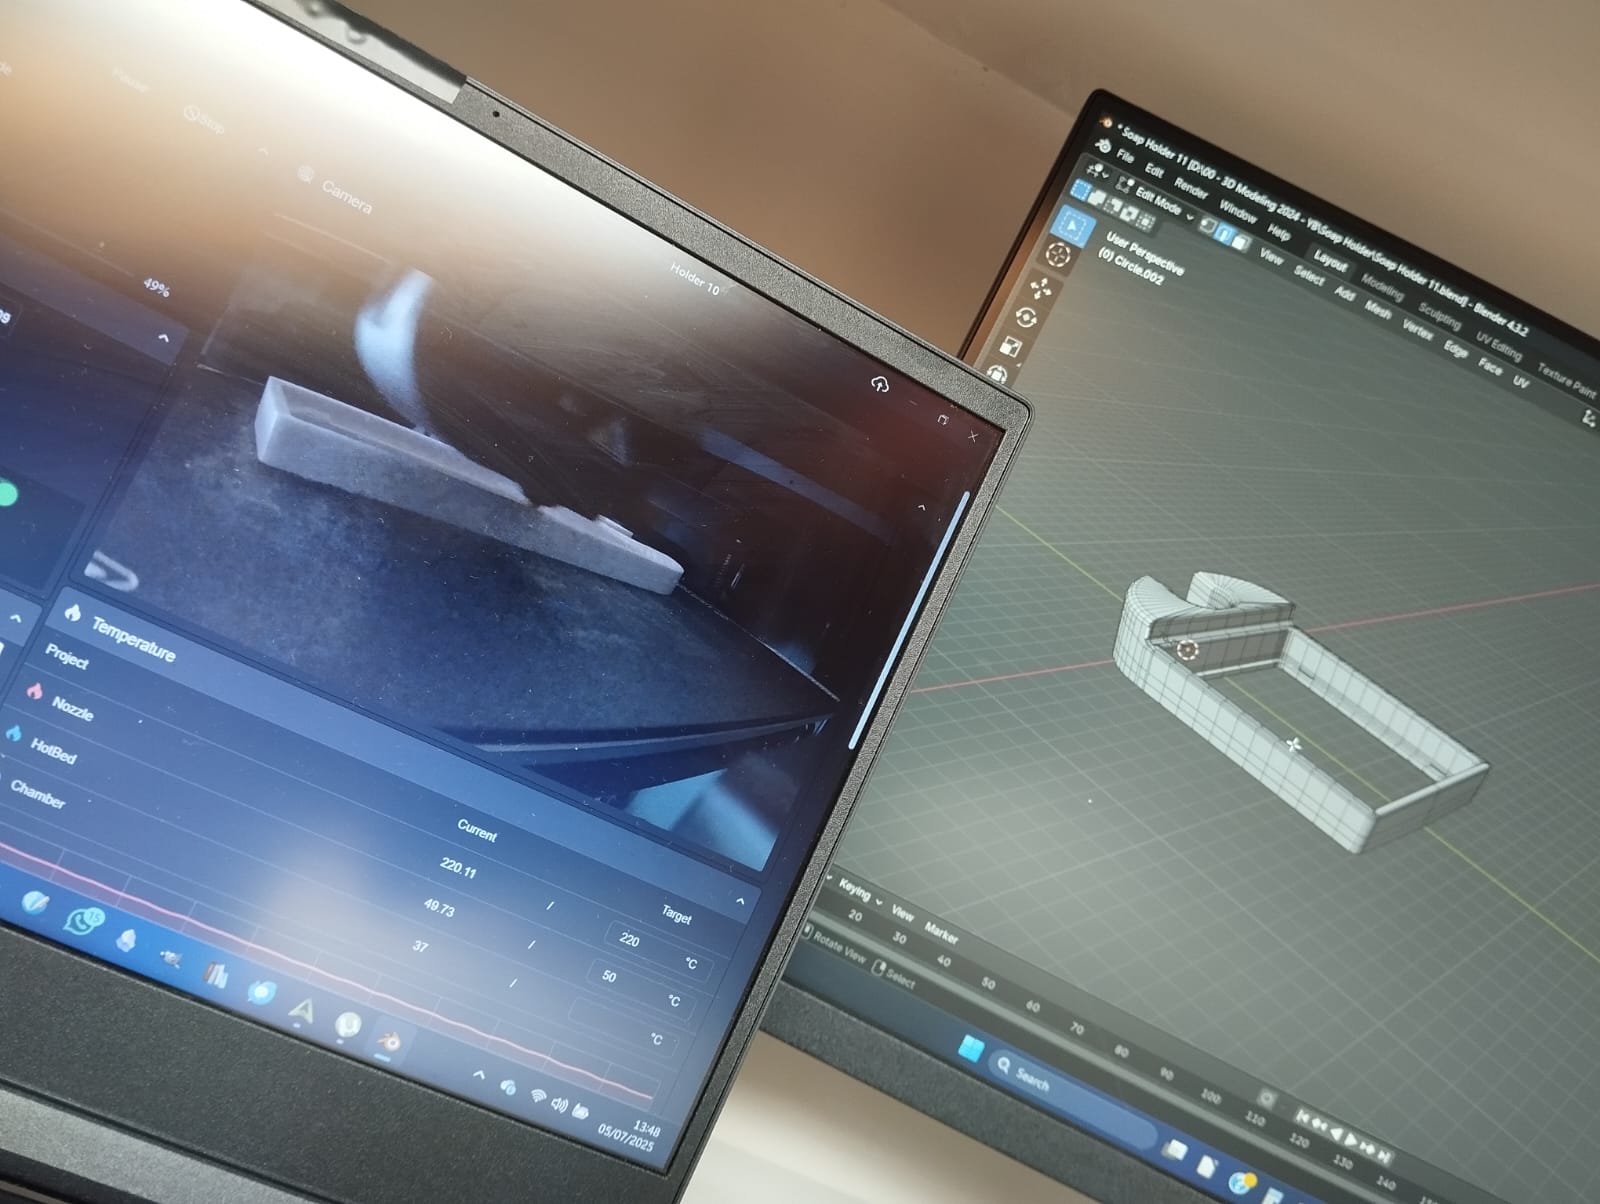
Above, the model on the right (I am using blender) and the printing in progress on the left.
I failed a few prints due to little technical problems. The filament was not unwinding properly, maybe the beginning of the wire passed under another ring which blocked the unrolling of the filament.
I fixed this.
I forgot to put glue on the plate, most of the time it works fine without but this filament is new and I never used that brand before.
I had to increase the temperature by 5 degrees and reduce the first layer height to 0.2 instead of 0.36.
As you will see I am impatient so I mounted a 0.6 mm nozzle instead of the 0.4 one which decreases my printing time without hindering the quality too much.
I was used to 0.4 nozzle since my first printer so I integrated the fact that my tolerance was 0.3. My first printer was a 3Drag (discontinued), the one I use now is a world away in terms of precision and ease of use. Tolerance is tricky, too much and the holder would slide on the bar and not stay in place, too little and it would simply not fit without a spring system…
So I launched a few prints to see how my print would fit on the existing pole and had to reduce the diameter of the circle a couple of times.
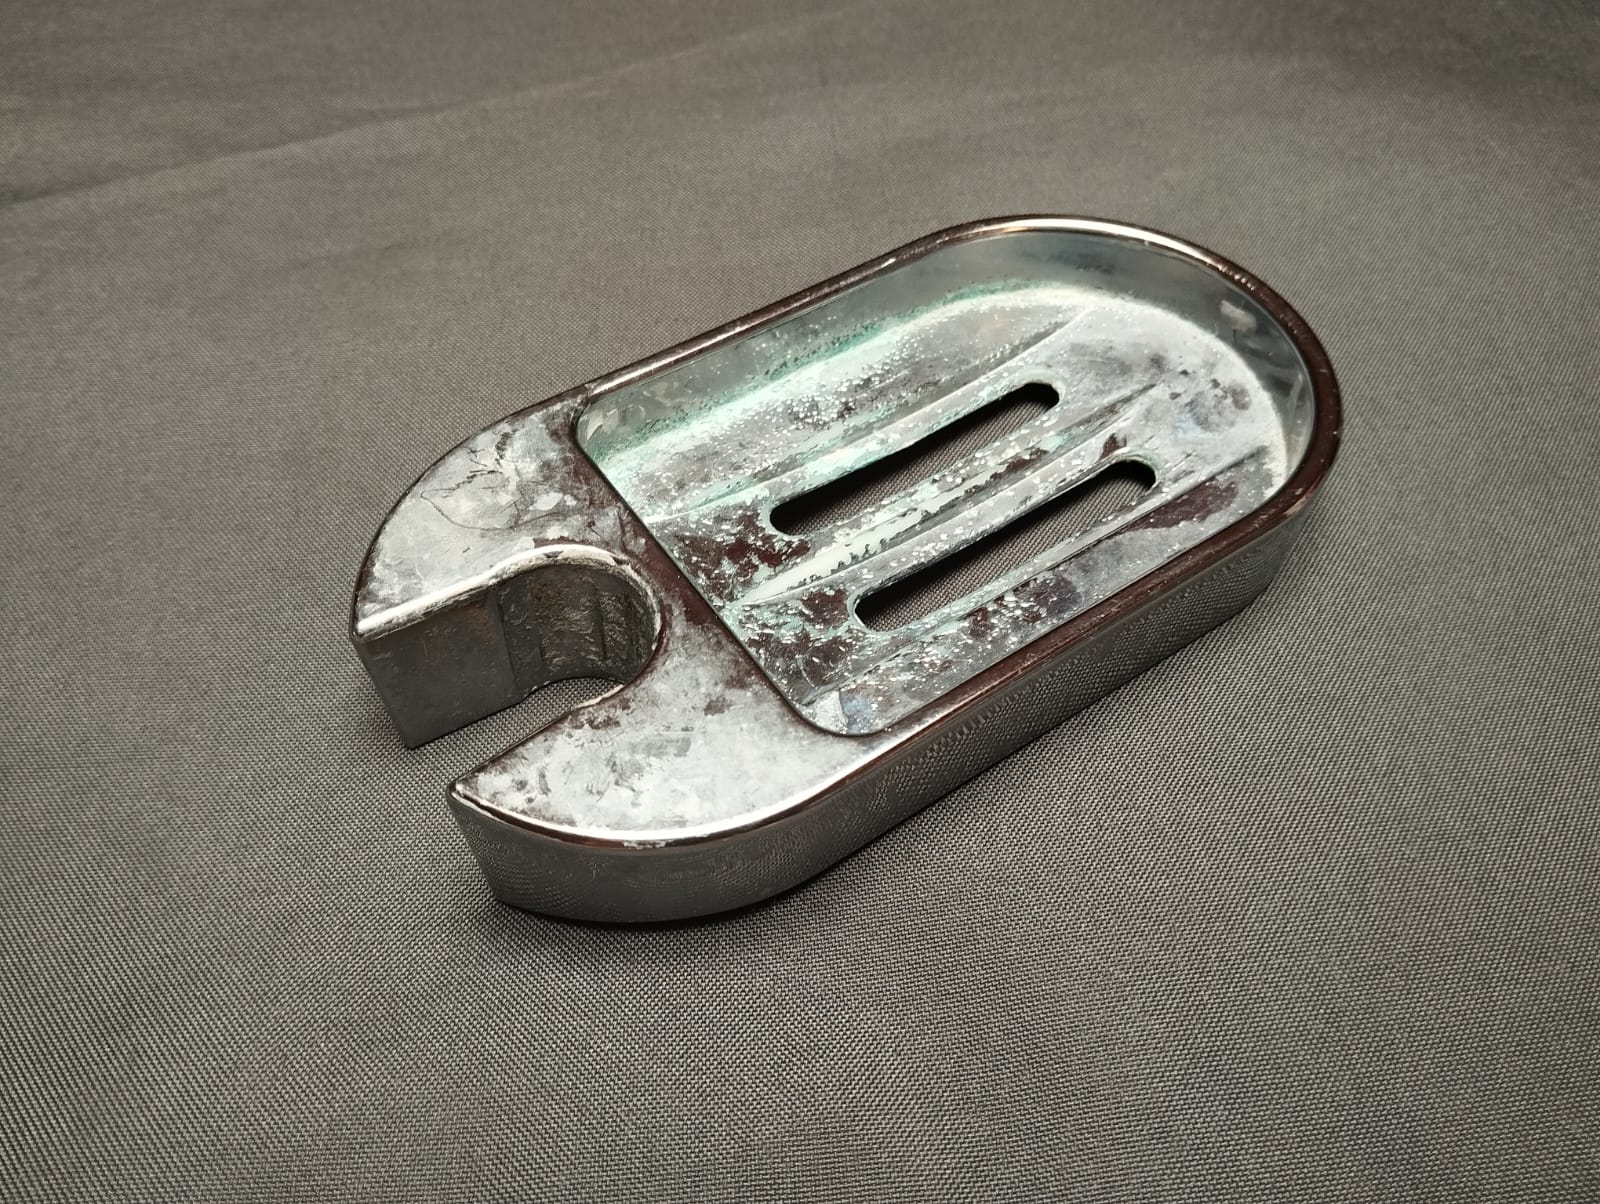
Here is my Alpha version.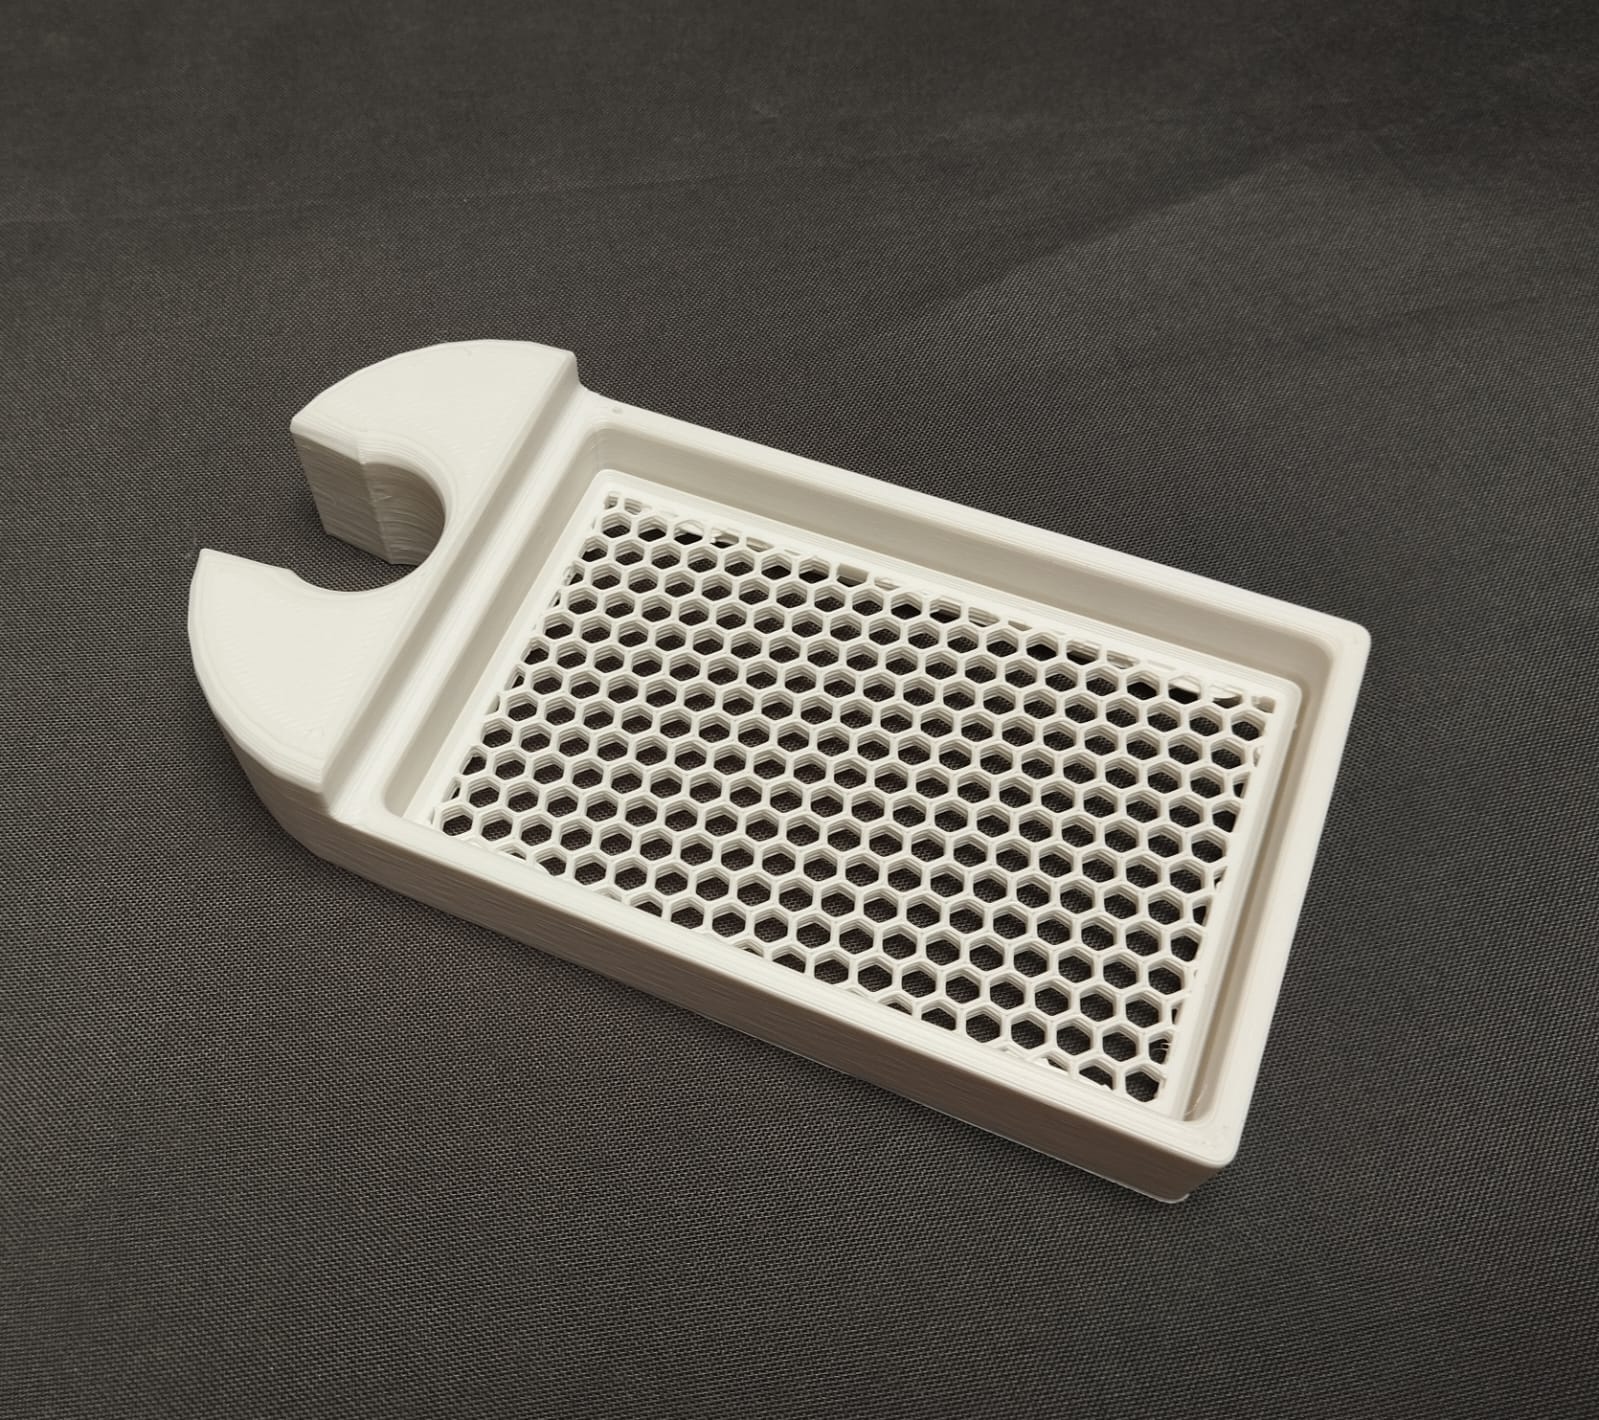
First version of the holder in two pieces, my intent was to clip the base in place.
It is printed in two parts as I am using a trick for the base.
When you print in 3D you create a watertight model and export it, I use STL.
Then you import it in a slicing software, a slicer is a software that will translate your object into instructions for your specific printer.
The principle is the following. The printer will recreate your object one layer at a time, it will deposit material one the X and Y axis, .
On the slicer you determine how many layers you want for the top and bottom of the object and the number of walls around the object because the objects you print are seldom full of material, inside a 3D printed object you stipulate an infill pattern and percentile of material you want to use, this will consolidate fill the void between walls bottom and top, linking or bridging them and consolidating the all object.
This advantage is that you use less material while preserving the strength.
The trick I used for the base on which the soap will be put is I regulated my infill but printed only walls, no bottom and no top, I used that little trick extensively in order to create filters in aeration ducts in the past, avoiding insects to get into the house.
It is printed separately, so the soap holder consists in two parts.
With a locking system (that would have to be modified as I put too much tolerance and it does not clips in hold the parts tight together)
The idea was to allow the water to evacuate for the soap to not melt and dry fast.
It sort of works of course but as you see in the following picture, some deposits are formed already after the first day of testing.

So this was the alpha version which took me about 45 minutes modeling and another 45 for testing and iterating. the whole print takes me around 1.23 + 0.18 hours, not counting the failures and partial prints I use for testing the fits. I can reasonably say that it took me about 4 hours overall.
Design is all about iteration.
You iterate an existing design, get inspired by it and make it yours.
Or you find and describe a problem and find solutions for which you will explore possibilities.
Do a prototype.
Choose the best one, refine and iterate until the problem is solved to your satisfaction.
A few problems emerged from the first version.
I would like to print it in one piece to facilitate the printing process. and create, not a flat plane on which to put the soap but an uneven one. The two existing examples I had at hand show attention to this. both present and uneven base. One with semi spheres, the other one with lines positioned on a slightly convex base.
I would like to create a mix between my design which I like and allows the air to pass under the wet part of the soap which allows to dry it faster, by reducing the contact between the soap and the supporting part of the base and by allowing more air to arrive to the soap.
If I want to print it in one piece it cannot be algorithmic / done with the trick I am using on the slicer.
I am have not yet dived into parametric design either so it will be for later.
I have to design the base, draw it, extrude it and integrate it in the holder itself.
See you later.
This is a bit later and I came up with the following model: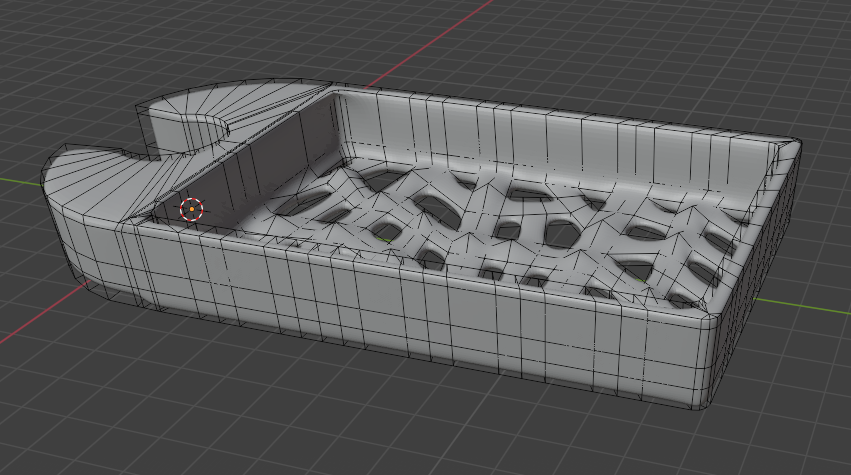
This respects my idea, I reduced the height on the left side, I created a sort of mesh at the bottom elevating points randomly. This is doing what I wanted to do but I don’t really like the end result. I won’t print it. I will sleep on this.
So I will probably go back to zero and remodel it all keeping what fits (the most important being the part that is holding the whole thing on the pole…) I will get there.
Second version
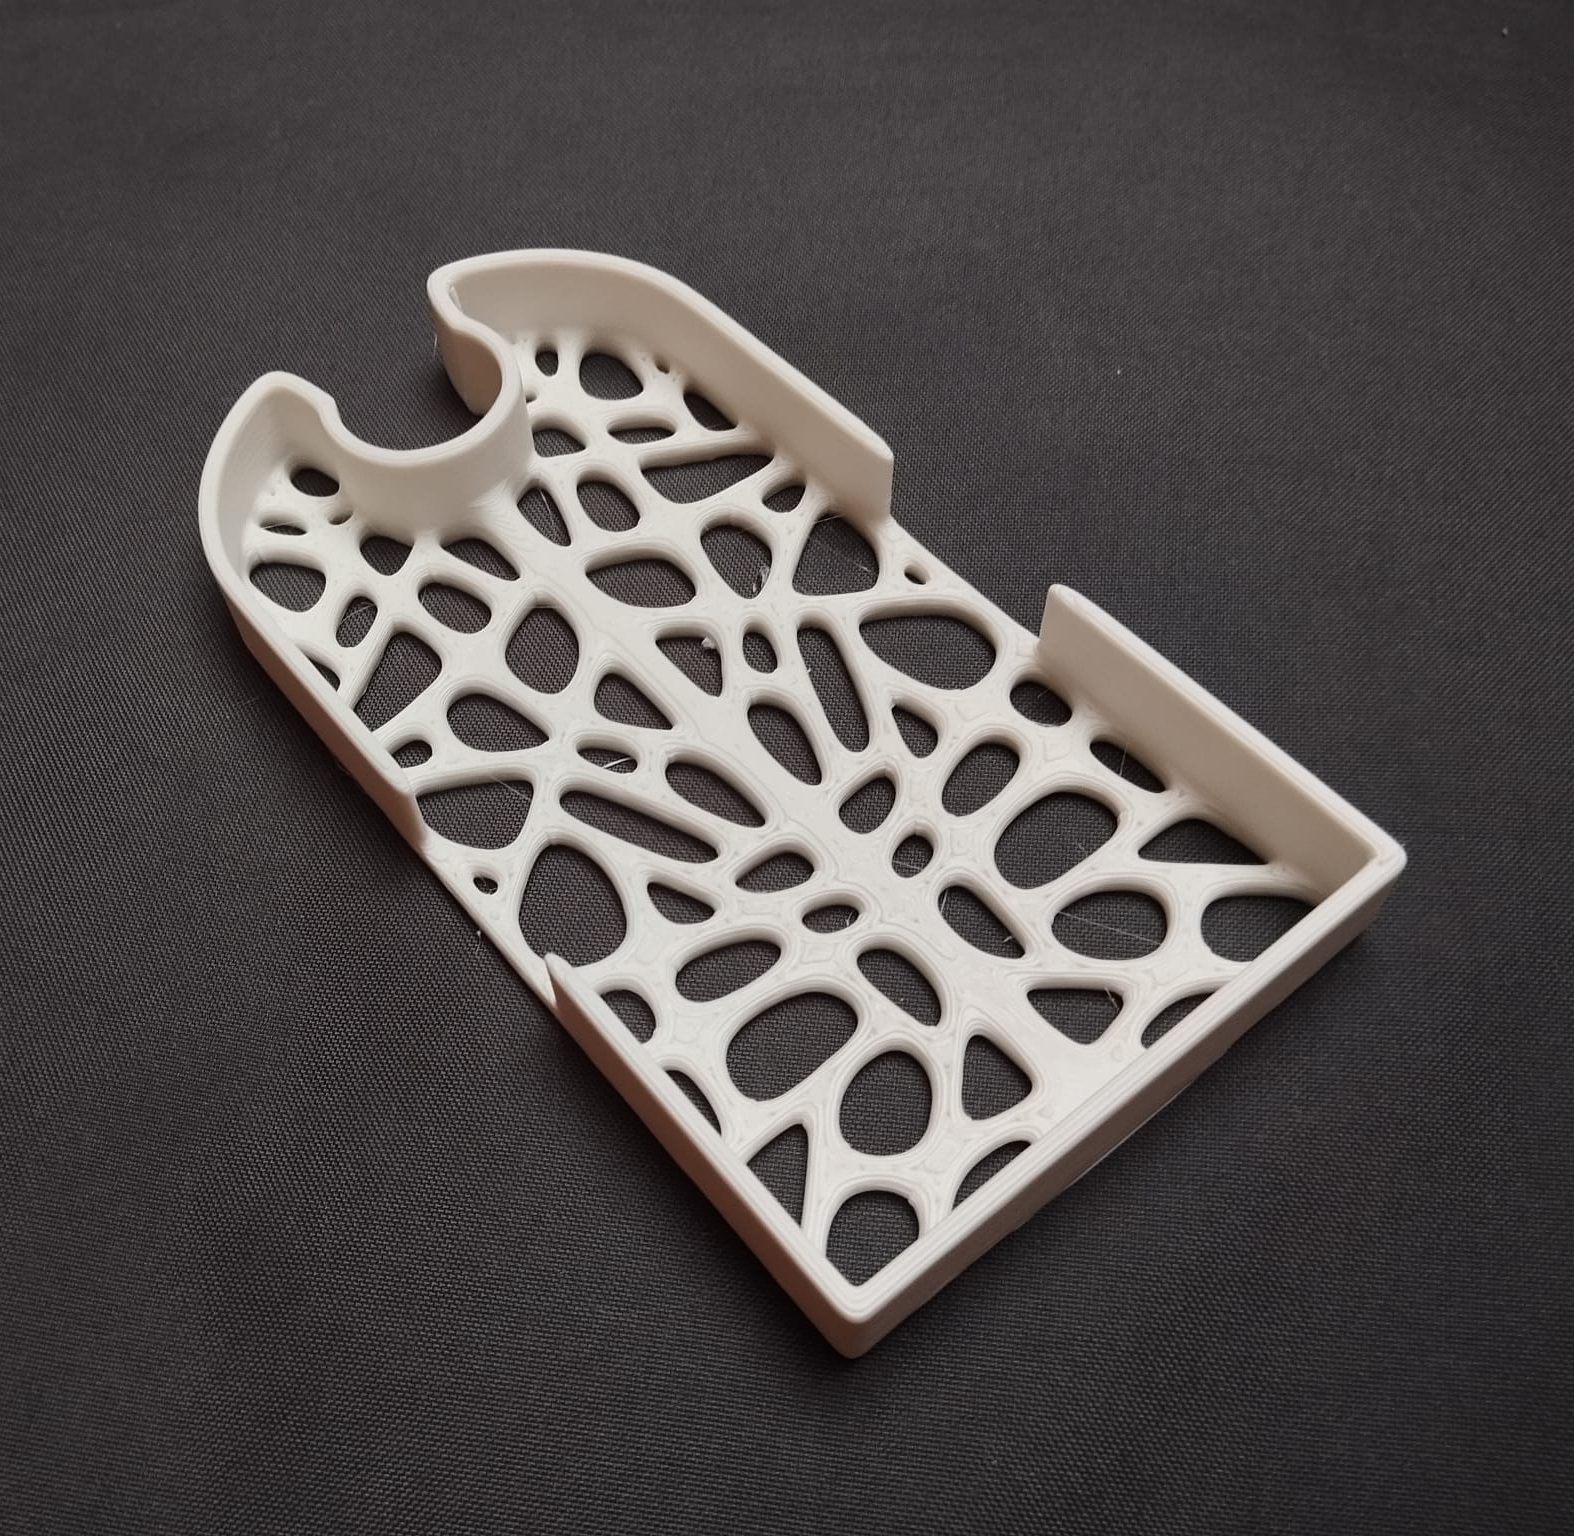
On the 8/07/2025 I chose to redesign the soap holder completely.
Keeping only the outer perimeter of it, I added some points ant the back of the semi circle and slightly reduced the diameter of it, you have to push it a little harder on the tube but it stays in place and does not slide down.
The part that was towards the clipping part was higher and filled.
It was a plane but I continued the texturing up to the clipping as it provides sufficient strength to the object.
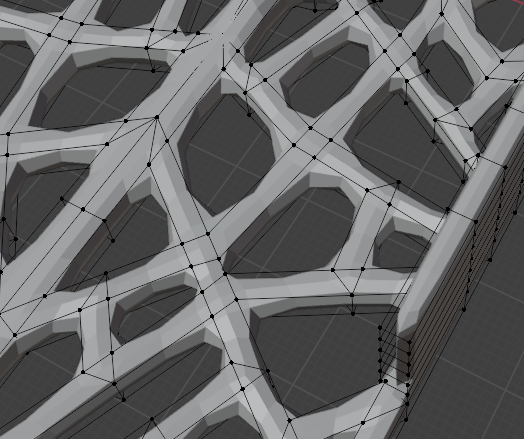
I decided to integrate the base to the holder and create the drainage holes by hand. I used a mirror which recalls the brain, cold shower is all about brain health. I added a subdivision surface modifier on the design to artificially add points. This has a “rounding effect” which has an advantage and a disadvantage.
The main disadvantage is technical and resides in the fact that it reduces the adherence on the building plate (which I manually corrected after applying the modifier). The advantage is that on the upper part it reduces contact surface between the soap and the holder itself, which is exactly what I wanted “to avoid the accumulation of water and allow the soap to dry faster”.
As you could see on the previous version, soap residues due to a melting of said soap were noticeable on the base which was a honeycomb plane, the draining part worked but the water accumulated on contact surface (soap / base). The other problem was that the base was separated, the soap adheres to the base and get stuck to it, you take the soap and the base follows which would have easily been solved by remodeling the contact part but it was unsatisfying.
Negatives thoughts:
- The only thing I could address is the symmetry of the base design which makes the pattern visible and the mirror recognizable.
- I could modify that but won’t unless specifically asked by someone who would be interested.
- I could as well have used a Voronoi texture for the base but this is a skill I have yet to develop.
In conclusion:
- I like the final design, it is functional and does what a soap holder should be doing, I can put my soap bar on it, even if it is oversized, the water goes away in a fast and swift manner, the minimal surface contact allows air to dry the soap after a shower, you have to push it a bit to fasten it to the bar but it stays in place, the advantage is that it is “plug and play” on a 25 mm pole, you do not have to use any tools to put it in place, just push.
I feel that the end result is overall good and would choose it over the two models I had at hand.
I am very interested in your opinion. Please do let me know how the product feels and if you find some iteration necessary.
“Perfection is a myth.
Be mythical! embrace imperfection”
NexusPolyCraft
27/07/2025
However there is always place for minimal improvements…
I noticed that the holder was not perpendicular to the bar. This disturbs me, not to the point of obsession but it seems to me that things have to be either perpendicular, or absolutely not. Which means straight or at least 10 degrees, I decided that this soap holder would have to be straight and I compensated for this tilt by adjusting the base on the opposite side of the opening, adding material to give the tip a nudge up.
No complicated calculation involved.
It worked.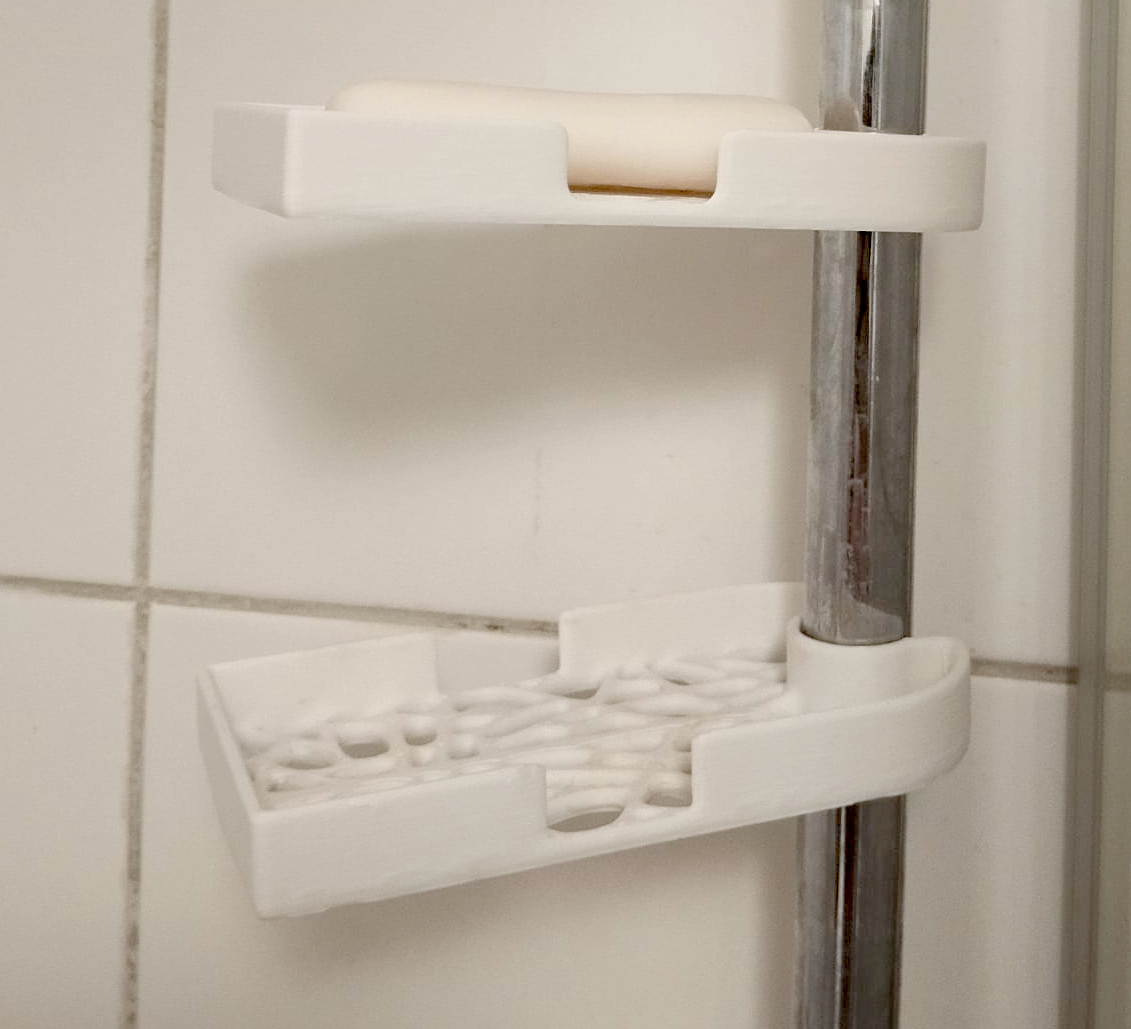
The new version is on the top. The oldest one at the bottom.
You can see as well that I rounded the angle at the base and top of the lateral opening that is there to pick up the soap. I have been testing my theory about the texture at the bottom allowing for a faster drying of the soap and it works just fine.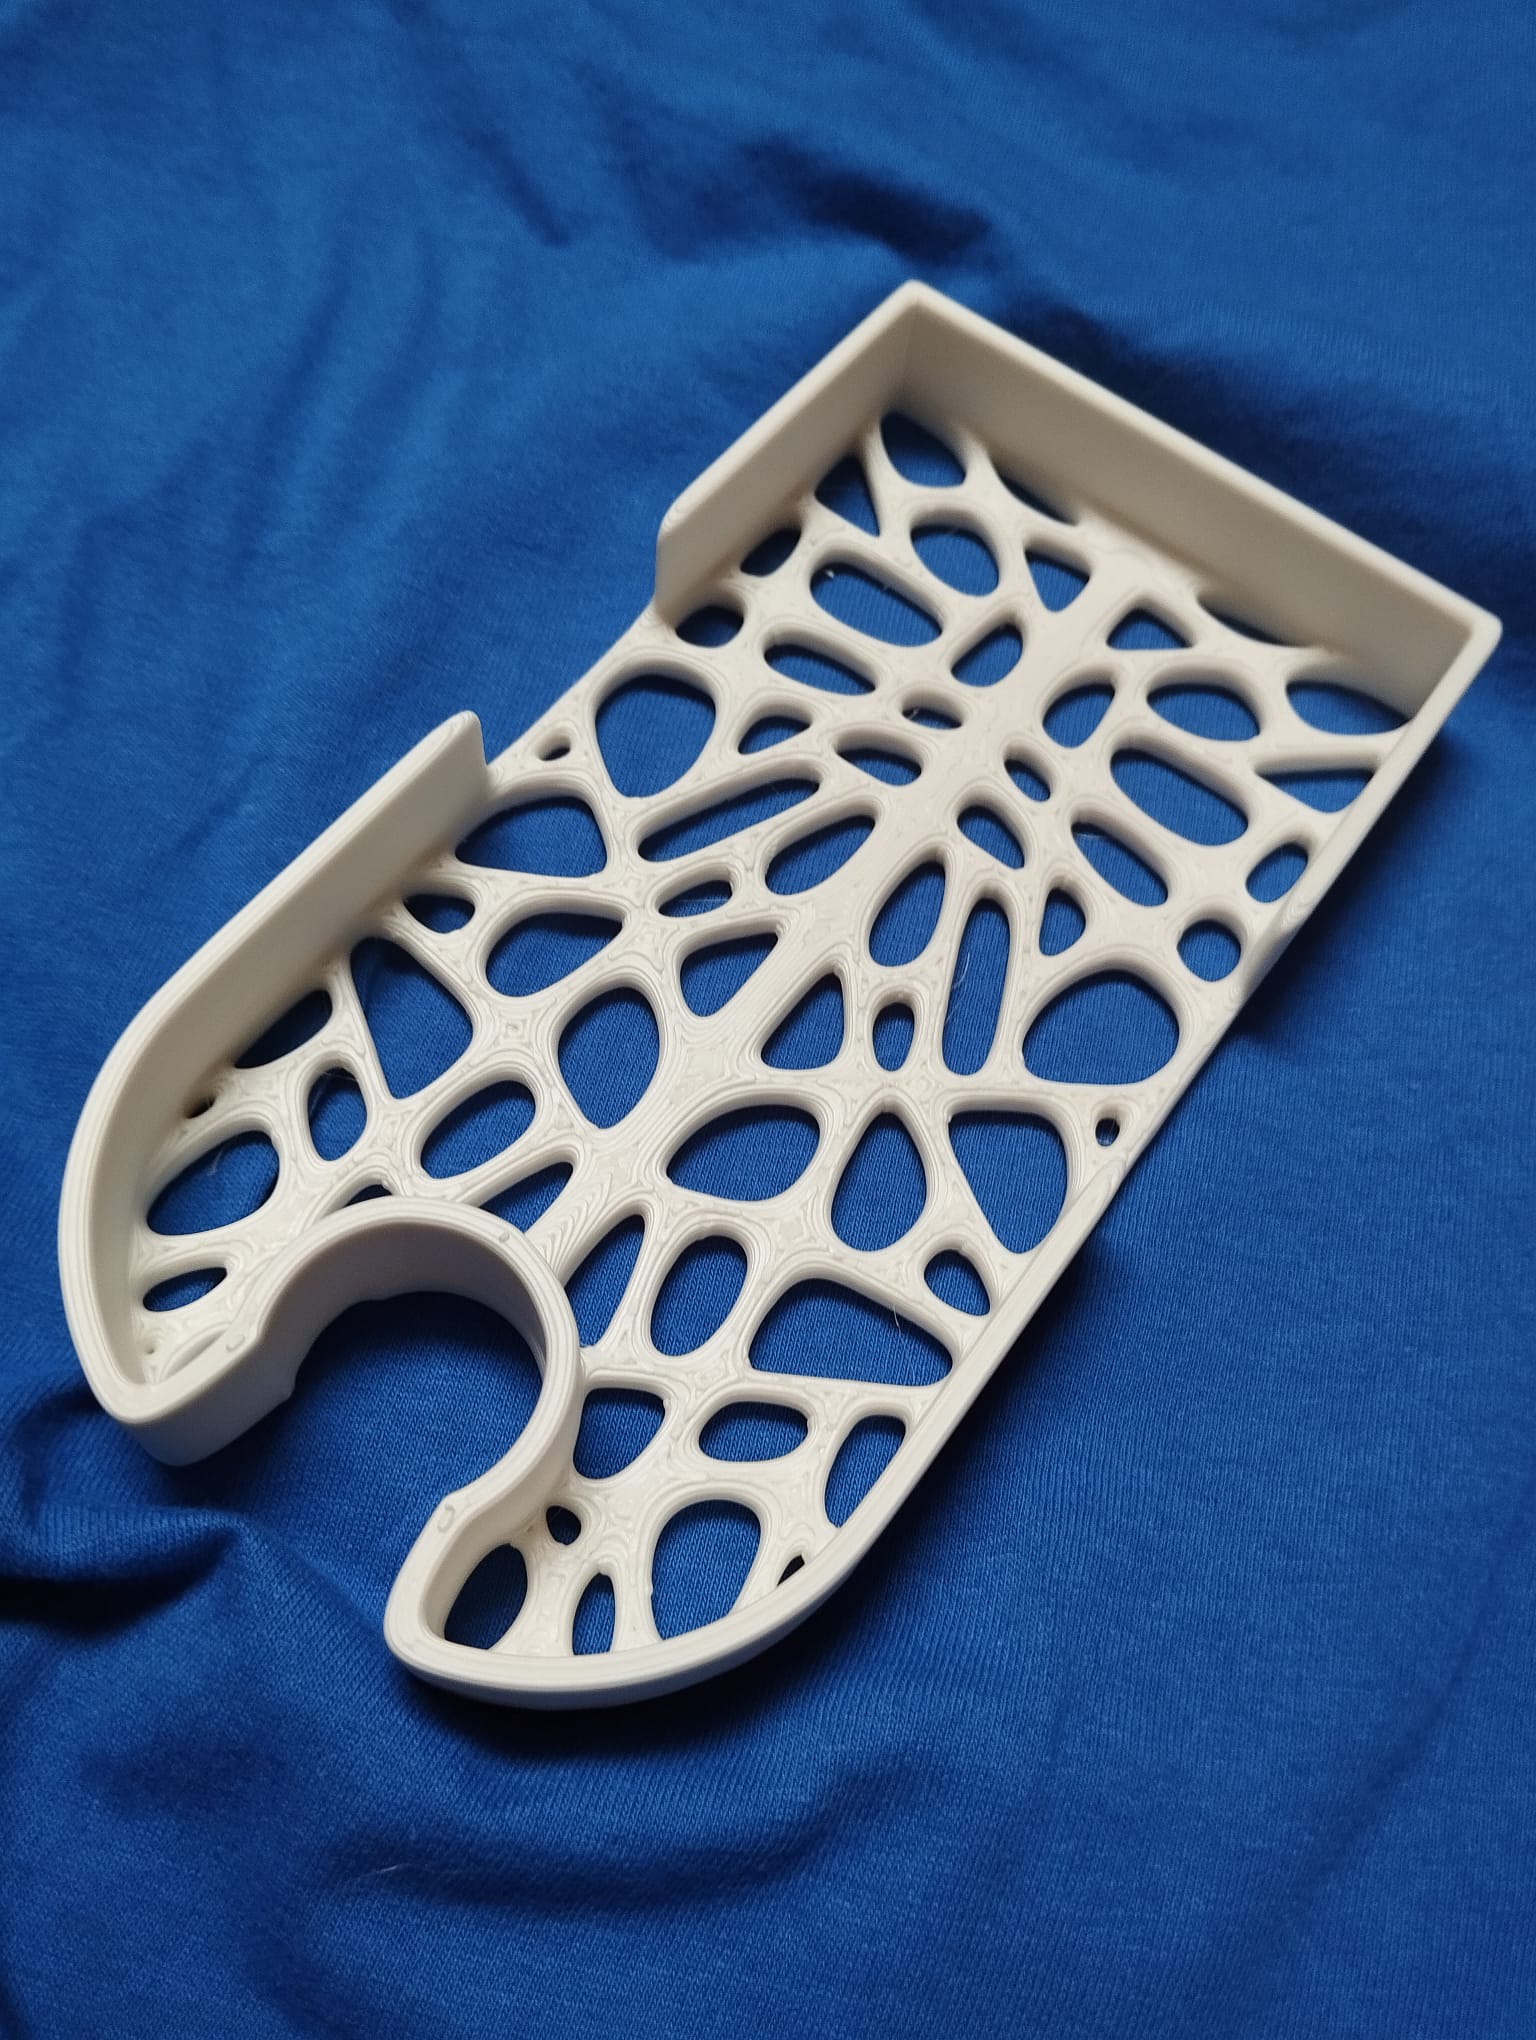
You can notice the layers on the photo and this is to be expected on a 3d print but I don’t find this to be a problem plus the fact that it is exactly what I was looking for: minimal contact between the soap and the holder
One last modification I am doing right now is make the opening very slightly bigger so that you don’t have to be a heavyweight champion to put it in place.